Rental residential or commercial properties offer a location to call your own without the financial dedication of purchasing realty. Nevertheless, they’re likewise less customizable due to proprietor and building policies that prohibit many long-term style changes. Rental cooking areas in specific include builder-grade surfaces or out-of-date functions overdue for an upgrade. Luckily, not all renovations need demolition or unalterable additions.
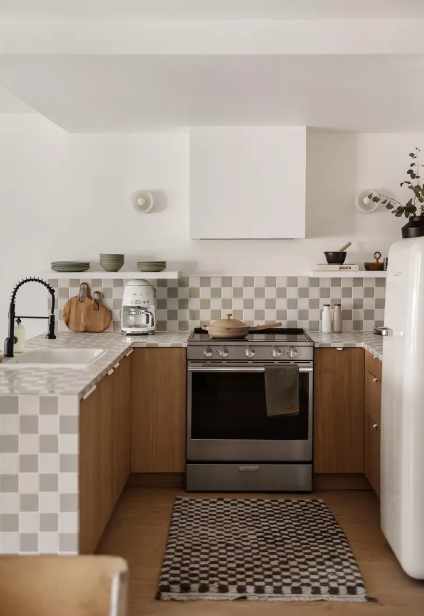
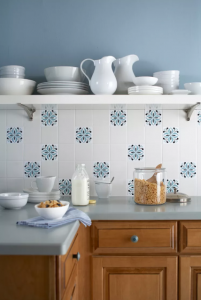
A kitchen area backsplash can include a splash of color, modernize and brighten a space, or include pattern. While counter tops, cabinetry, and home appliances typically can’t be changed, a peel-and-stick backsplash allows occupants to customize their cooking area to their preferences. The DIY product is more inexpensive than standard tile and easy to install– plus, it’s easy to remove when it’s time to leave.
Kinds Of Peel-and-Stick Tile
Vinyl and PVC
The most popular and economical type of peel-and-stick tile is vinyl or PVC. The sheets are made to fit together like a puzzle, simply like typical tiles. While not as reasonable as real tile, it’s a worthy lookalike when on a spending plan.
Natural Stone and Ceramic
Natural stone, ceramic, and marble– materials normal of tile backsplashes– are considerably more long lasting but likewise more pricey. These peel-and-stick sheets can likewise be found in a variety of patterns and colors and will have the texture and depth of genuine tile.
Closing the space in between vinyl and conventional tile, gel peel-and-stick backsplashes offer the very best of both materials. Gel tiles have a 3-D look like real tile, however they’re as simple to set up as vinyl and PVC sheets. While not as solid or long lasting as stone or ceramic, these tiles are still simple to tidy, set up, and get rid of.
Glass or Metal
Comparable to conventional tile products, both glass and metal peel-and-stick backsplashes are resilient and more reasonable in appearance. While more costly than vinyl, PVC, and gel, glass and metal alternatives are more economical than natural stone or marble. Both require unique tools to cut the hard materials when set up around items or edges.
Tips for Installing a Peel-and-Stick Backsplash
Tidy Thoroughly
Peel-and-stick tile can be put on a plain, flat wall, granite, and even existing tile. No matter the surface area product, it’s very crucial to clean the surface well prior to installing your sheets of peel-and-stick tile. Use an all-purpose cleaner and a fabric to get rid of all residue.
Fill Out Existing Seams
If you’re installing peel-and-stick tiles on top of existing tiles, a crucial action is to grout or caulk the joints in between the tiles to produce a flush surface area on which to put your new sheets. This will assist your new backsplash appearance even and practical, however also avoid any mold or mildew from building up in crevices.
Consider Extra Adhesive
As soon as your surface is tidy and even, it’s time to place your sheets of peel-and-stick tile. While not needed, you can coat the back of the tiles with spray adhesive after peeling the protective backing for extra guarantee that they stick effectively.
Step and Cut Without Stretching
When it comes to vinyl, PVC, or gel tiles, make sure to never ever extend your adhesive tile sheets while putting them on the wall. It may be appealing to attempt and require sheets to fit the next edge or sheet, however it will just leave you with an irregular appearance that will give away your peel-and-stick trick. Take the time to measure the location you want to cover prior to purchasing tile so that you can guarantee you have more than enough on hand. You can even attach lightweight peel-and-stick sheets to the wall with masking tape to prepare your design prior to taking off the backing. It’s useful to note which ones you will need to cut to fit around outlet plates, home appliances, kitchen cabinetry, and wall edges. Be sure to use a sharp blade or glass nipper when cutting sheets to size.
Cleaning Considerations
Safe-to-Use Cleaners
Given that peel-and-stick tiles do not normally feature deep ridges or grout lines, they are normally really basic to tidy. Utilizing something as easy as a damp cloth or all-purpose cleaner and a paper towel will typically get the job done. Just make sure to dry off the surface with a clean towel later. For discolorations that won’t budge, you can try diluted rubbing alcohol or baking soda, or vinegar, but check with the maker’s advised cleaning guidelines initially to prevent damage or discoloration. For a scrubbing tool, utilize a mild microfiber fabric or non-scratch sponge.
Cleaners to Skip
Avoid harsh cleansing chemicals like ammonia or bleach to avoid discoloring or harming the tiles. Likewise roaming from cleaners that leave a residue, like oil-based cleaners or detergents. Abrasive scrubbing tools like steel wool need to never be used to prevent scratching the surface.
For How Long Do Peel-and-Stick Tiles Last?
Given that peel-and-stick tiles aren’t a permanent service and most ideal for leasings, they will not last permanently. However, if set up well and not constantly exposed to water, they must maintain at least 5 years of their initial appearance. Make certain to clean them effectively to ensure their durability.
How to Remove Peel-and-Stick Tile
When move-out day shows up and it’s time to eliminate all of your personal touches, thoroughly remove your peel-and-stick backsplash. Use a hairdryer to apply heat to the surface area as you remove each sheet.